You can find more scripts for MRL and for InMoov in the Download tab:
If the script is a Inmoov.xxx it is for the MRL version 1695
If the script is a inmoov2.xxx it is for the latest versions
I have modified the pin setting of jaw servo between the two versions
I have added eyes pins which now allow 4 PID tracking.
-Version 1695 pin 12 on Arduino Uno (right side of the robot)
-Version latests pin 26 on Arduino Mega (left side of the robot)
You can find the hardware map and pins connections for inmoov 2.0 here:
It is not completely functional but it will have more features than inmoov 1.0
Thanks to Grog, and Alessandro we are progressing!!
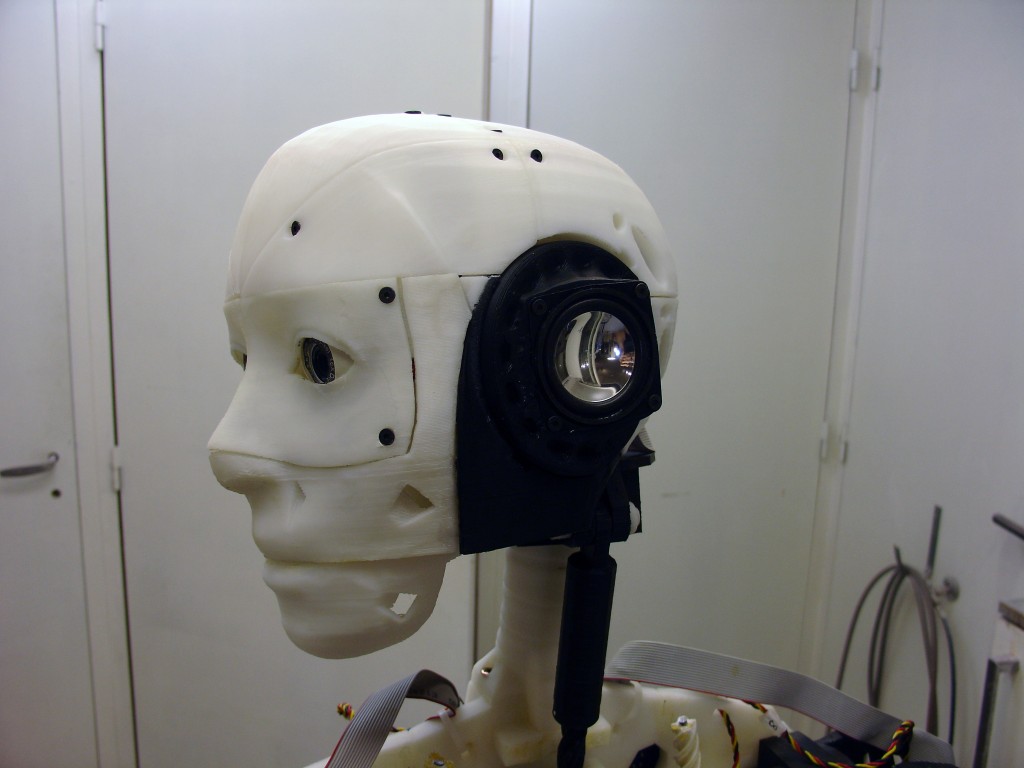
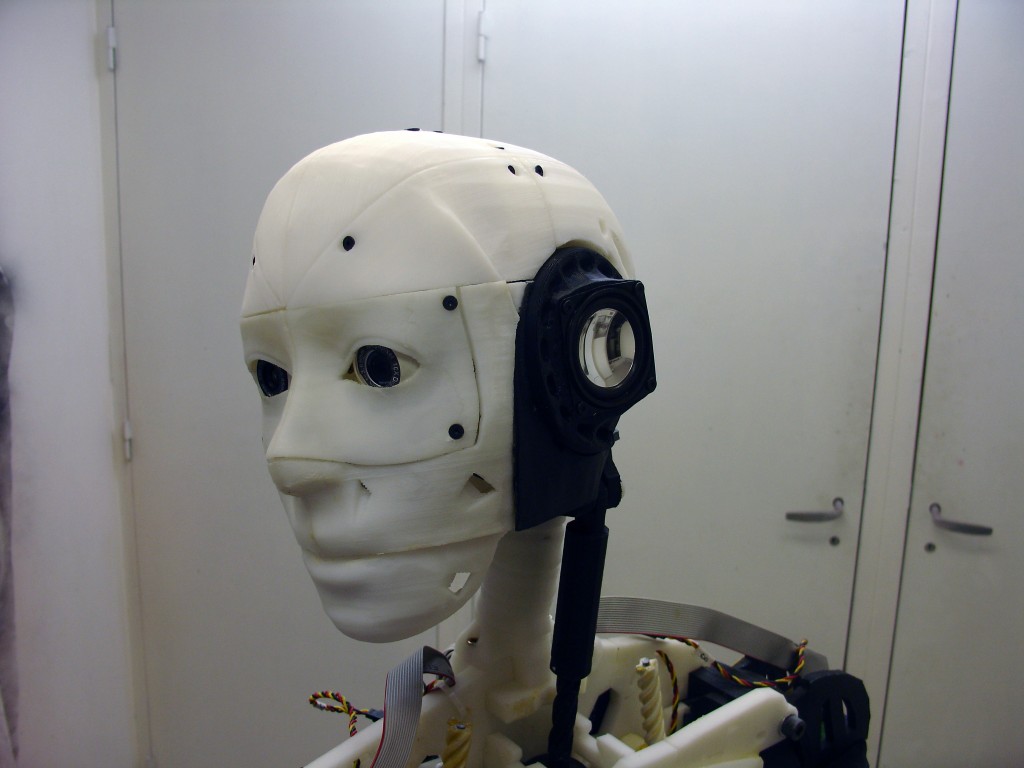
Haven’t you ever dreamed of speaking with your ears? Well InMoov can!!
🙂 Seriously, who would dream of that, anyway, I have designed a new set of ears in which we can mount little speakers, see pics below
To Voice control your robot: You can either use the speakers of your PC(desktop, laptop, raspi, odroid, etc.) or headphones or external speakers. You can either use the microphone of your PC or a bluetooth headset like I do.
To do that I had to re-print the complete skull, because I was using the original version which didn’t have the 2 locks for the ears, you guys won’t have to go through that trouble because you have the correct version. You can see a difference of color between the skull and the face. Natural ABS tends to get a bit yellow when it gets older, specially in the sun.

We can use any little USB speakers for PC available. They are very low in price. I could not recommend a specific model because the one I used were already torn down and I had not the brand tag anymore.
These seems to be about the correct size: Frisby USB Mini 2.0 Stereo Computer PC
Please let us know on the forum, what you buy and if they fit my design.
You can use the Speaker STL to get the specification size requirement.
Download them here:
http://www.thingiverse.com/thing:90033
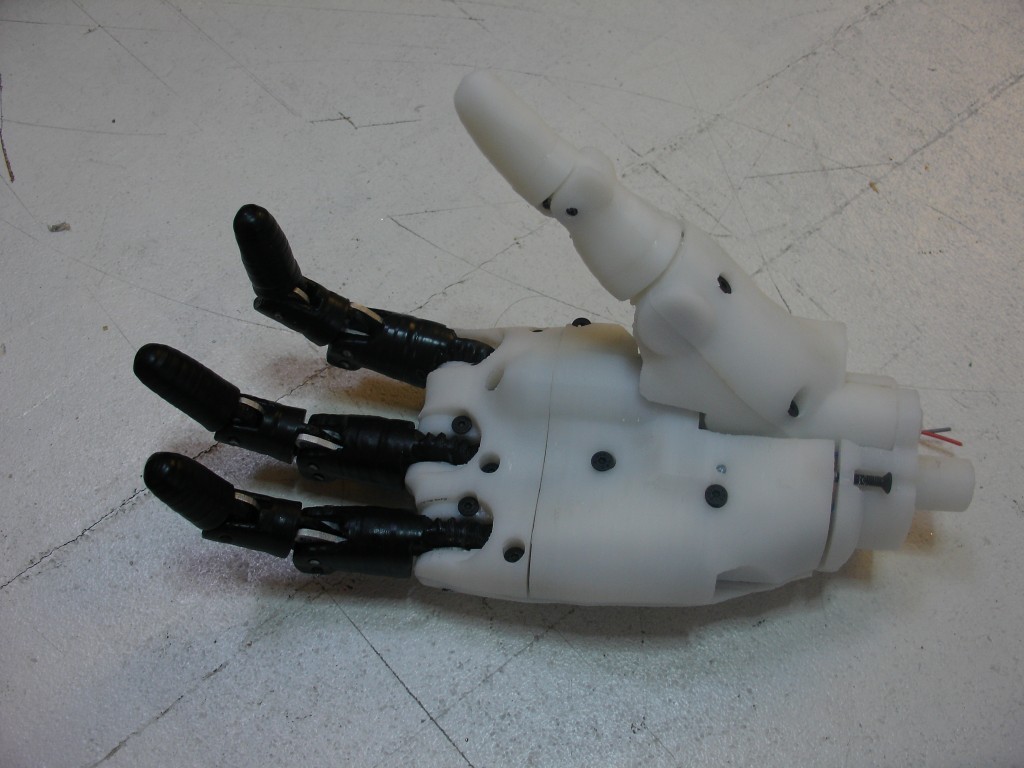
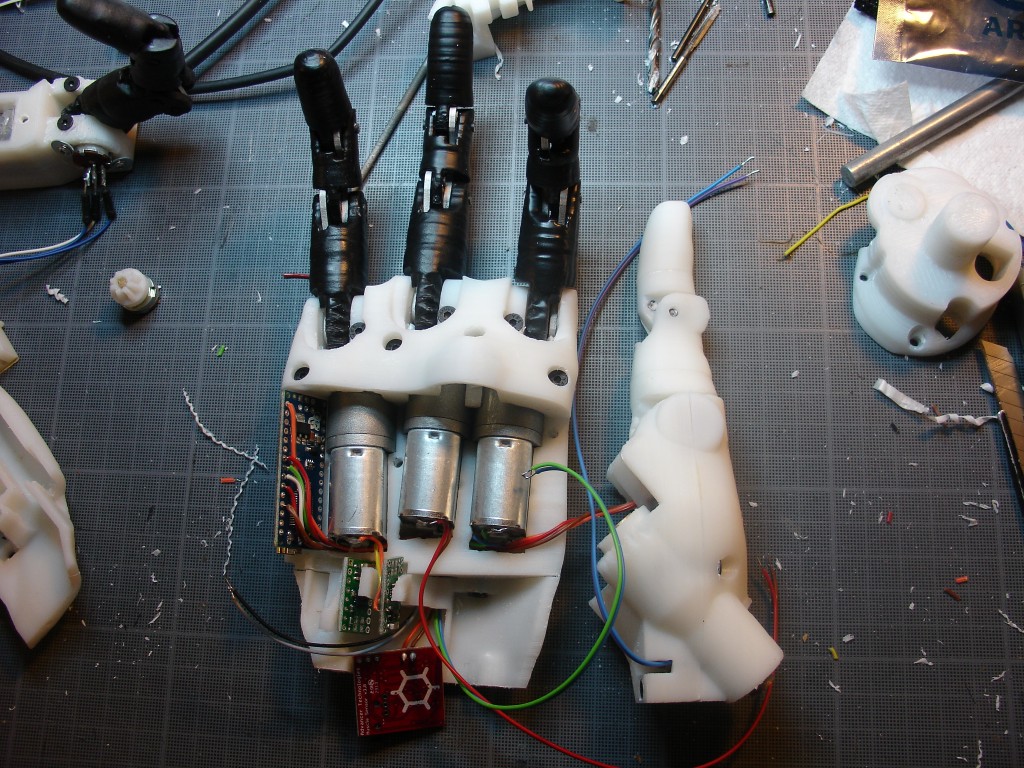
This is the new InMoov Hand in progress. The design is just about ready, and I will post the parts soon for download.
What I want to do with this, is to put for download most of the parts, with the same non commercial license as the robot. But I will print myself two parts and sell them for 300 euros without postage fee. This will help me to finance my InMoov project for a while. Again, I really want to thank all the people that have made a donation. But it is not enough to keep buying servos and ABS to run all the experimentations I’m doing, and of course I’m not counting the numerous hours spent to help people on the forum, emails and designing the parts… When I aded the paypal button I was hoping that donations would be sufficient to finance the project. I definitely need to find another way.
Being OpenSource cost money in this world.
You can see the Advancer Technologies sensor board, the Arduino nano, the driver boards and the motors.
As you can see the parts are designed and sculpted in a way to get the shape of a human hand, to be technologically viable and to get the best results with our home printers. This last part is often forgotten in the conception. You can easily create nice looking shapes with your 3D modeler but if you don’t think of how this is going to come out on your printer, you will end up with parts covered with waves, and what looked nice on your screen will turn out badly on your print. When I design the part I also try to avoid surfaces with a low angle degree, parts always turn out nice when they are standing up on our FDM printers.
I have made a first PDF sketch of the various connections required in the hand. It is not finished because I think I have made a mistake of connections some place and I fried my Arduino Nano (I think). This is why I don’t make a demo video with the fingers in action. Although I can test finger by finger to see if it all works.
So you can see the various components set within the hand and if anyone can contribute by finishing the connections I will be more than happy to post it here on the site for to share with everybody.
Prosthetic InMoov Connect PDF.
Connections drawing 1 PDF
Connections drawing2 PDF
Here are some pictures of it during the build process:
Sculpteo, Arthur invited me to do a conference at the NUMA center in Paris, (it is our Silicon center).
I met a lot of very interesting people, I need to mention Stéphane from Cogibot.
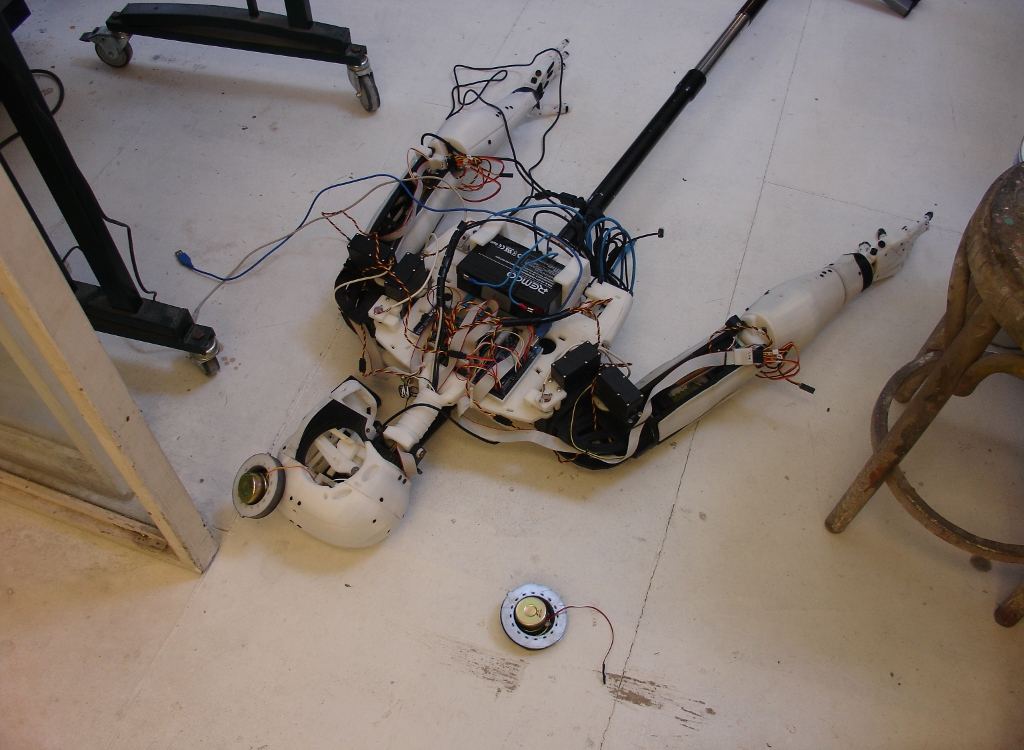
Oh, and just to let you know InMoov fell flat on his face the other day…
Tried to catch up my phone, I bumped into the robot, and SLAM!!!!
Fortunatly InMoov is resistant, I would have expected a lot more broken.
1 thumb tip broken, neck worm piston broken, some parts dismantled in the bicep right, one forarm open dismantled partly, nothing bad.
ABS is great because you just reglue the parts with ACETONE and Voilà.